 Ferndale
 Siding Repair Built for Lummi Island's Marine Climate
Lummi Island homes sit in one of the more demanding exposure zones in Whatcom County. Being surrounded by Puget Sound water means siding here takes a steady diet of salt-laden air, wind-driven rain coming off the water, and long stretches of shaded, damp ground that keep moss and algae established almost year-round. A siding repair on Lummi Island isn't the same job as a repair three miles inland in Ferndale proper — the exposure is more aggressive, and the fixes need to account for that or they fail again within a season or two.
We're a Ferndale-based crew, and Lummi Island is part of our regular service area. That matters more than it sounds like it should. A contractor who only shows up once for a bid and once for the repair doesn't have the same read on how a specific stretch of the island behaves in a January southwesterly compared to a contractor who's already worked on homes nearby and knows what tends to go wrong first.
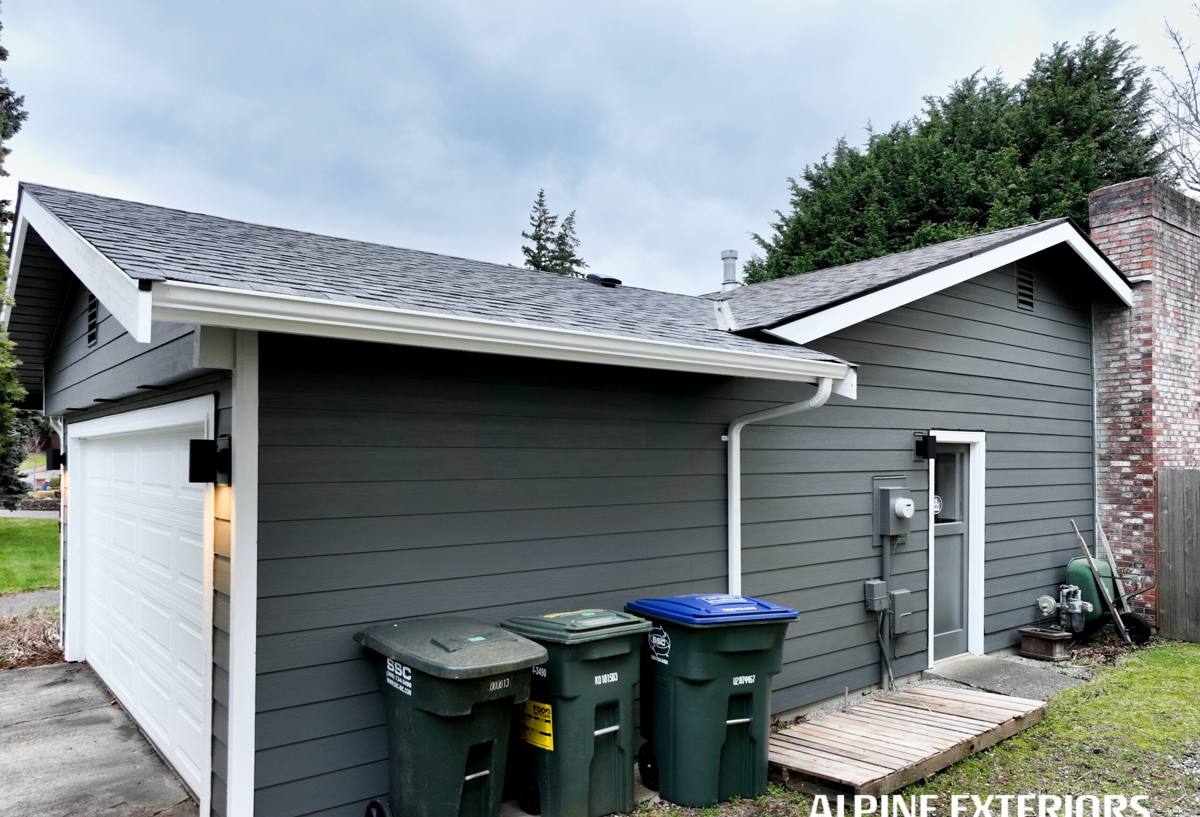
What Salt Air and Driving Rain Actually Do to Siding
Understanding the failure pattern is the first step to fixing it correctly instead of just patching the visible symptom.
Salt air
Airborne salt is corrosive to exposed metal fasteners, flashing, and trim hardware. Once a fastener starts to corrode, it loses its grip on the substrate, siding boards work loose, and water gets a path behind the cladding. Salt exposure also accelerates the breakdown of caulk and sealants, so joints that would last a decade elsewhere can crack and fail years sooner on the island.
Wind-driven rain
Rain that comes in sideways off the water doesn't behave like rain falling straight down. It gets pushed up under laps, into butt joints, and around window and door trim that would stay dry in a calmer setting. Siding systems are designed to shed water moving downward — driving rain tests every seam, and it's usually the seams that fail first.
Moss and prolonged dampness
Whatcom County's moss season runs long, and shaded, tree-lined lots on Lummi Island hold moisture even longer than open ground. Moss and algae growth on siding isn't just a cosmetic problem — sustained dampness against a siding surface is what lets water intrusion take hold at any point where the surface is already compromised (a hairline crack, a popped fastener, a gap in caulking).
Signs a Lummi Island Home Needs Siding Repair
- Soft or spongy spots when you press on the siding, especially near the bottom courses and around window sills
- Visible gaps opening up at butt joints or where boards meet trim
- Persistent moss or algae staining that keeps returning after cleaning
- Paint or finish that's bubbling, peeling, or chalking unevenly in patches
- Fasteners backing out, rust streaks below nail heads, or visibly corroded trim hardware
- Interior signs — a musty smell, discolored drywall, or peeling interior paint on an exterior wall
- Warping, cupping, or delamination on any wood-based siding still on the home
Any one of these on its own might be minor. Several showing up together, especially on a wall that faces the water or prevailing wind, usually means moisture has already gotten behind the cladding and the repair needs to address what's underneath, not just what's visible.
What a Correct Repair Actually Involves
A siding repair that's done right on an exposure like this isn't just swapping a damaged board for a new one. It's a short diagnostic process followed by a fix that matches what caused the damage in the first place.
1. Find the actual water path
Damaged siding is a symptom. Before replacing anything, we trace back to where water is actually getting in — a failed seal at a window, a flashing detail that was never installed correctly, a joint that's been open long enough to let water track sideways under several courses. Replacing the board without fixing the entry point means the repair fails again.
2. Check the water-resistive barrier and sheathing
Once siding is off, we look at the house wrap or building paper underneath and the sheathing itself. If water has been getting behind the siding for a while, there can be soft or rotted sheathing that needs to be addressed before new siding goes back on. Covering rotted sheathing with new siding just hides the problem for another year or two.
3. Correct flashing and trim details
A large share of repeat siding failures near the water trace back to flashing — over windows, at deck ledgers, at horizontal trim boards — that wasn't lapped correctly to shed water downward and outward. We rebuild these details to actually work with gravity and wind-driven rain, not just to look finished.
4. Match and integrate the new material
Patching in new siding so it blends with weathered existing material and ties into the drainage plane correctly takes more care than a straight board swap. Fastener pattern, caulk joints, and paint or factory-finish matching all affect whether the repair holds up and looks intentional rather than patched.
5. Re-seal and inspect
Every touched joint gets properly sealed with the right product for the substrate, and we walk the repair area once more before calling it done, checking for anything that could become the next entry point.
Repair vs. Replacement: How We Help You Decide
Not every problem area on a Lummi Island home needs full replacement, but past a certain point, repeated repairs stop making financial sense. Here's how we generally think about it.
| Factor | Leans toward repair | Leans toward replacement |
|---|---|---|
| Extent of damage | Isolated to one wall or a few boards | Recurring across multiple walls or elevations |
| Underlying material | Sheathing and framing still sound | Rot has spread into structural framing |
| Siding material | Still-available, structurally sound material | Discontinued, brittle, or failing wood/composite siding |
| Age of siding | Under 10-15 years, otherwise performing well | Original siding is decades old and failing broadly |
| Cause | One-time event (impact damage, a single bad flashing detail) | Systemic moisture intrusion tied to the product itself |
We'll always tell you honestly which side of that line your home falls on. If a targeted repair will genuinely hold up against the island's exposure, that's what we'll recommend — we're not trying to sell a full re-side when it isn't warranted.
Why We Only Install James Hardie Fiber Cement
When repair does turn into replacement — whether it's one wall or the whole house — we install James Hardie fiber cement exclusively. We don't install vinyl, LP SmartSide, primed spruce, cedar, or other fiber cement brands, and on a marine-exposure site like Lummi Island, the reasoning is straightforward.
Wood-based siding products, no matter how well they're primed or treated, are organic material. In a climate with this much sustained moisture and moss pressure, wood-based siding is fighting its own composition — it wants to absorb water, swell, and eventually rot at the edges and fastener points. Vinyl handles moisture fine on its own, but it's a thin material that can warp or crack under UV exposure and impact, and its seams and expansion joints are more vulnerable to the kind of driving rain the island sees regularly. Other fiber cement brands vary in formulation and factory finish quality, and we've standardized on the one product line we've found holds up consistently to spec.
James Hardie's HZ5 product line is engineered specifically for climates like ours — freeze-thaw cycling combined with high moisture exposure. It's non-combustible, it doesn't swell or rot the way wood-based products do, and its ColorPlus factory finish is baked on under controlled conditions rather than field-applied, which matters a great deal when the alternative is trying to get a field finish to cure properly during a wet Whatcom County stretch. It also carries a strong transferable warranty, which is worth something concrete if you sell the home down the line.
What Correct Hardie Installation Requires
- Proper fastener type, spacing, and embedment per Hardie's published installation instructions
- Correct clearance from grade, decks, and roof lines to keep the bottom edge out of standing water and splash-back
- Caulking only at the joints Hardie specifies, using a sealant rated for the application
- Flashing integrated at every penetration and horizontal transition, lapped to shed water outward
- Field-cut edges sealed or back-primed where Hardie's instructions call for it
Fiber cement is a forgiving, durable material, but only when it's installed to the manufacturer's spec. Skipped clearances or wrong fasteners are what turn a 30-year product into a callback in year five.
Why a Ferndale Crew That Already Works Lummi Island Matters
Lummi Island has its own logistics — ferry scheduling, tighter delivery windows for materials, and a housing stock that includes a mix of older cottages and newer construction, each with different repair histories. A crew that already routes work out to the island on a regular basis has already solved the scheduling and material-staging problems that can turn a simple repair into a drawn-out one for a contractor unfamiliar with the area.
More importantly, we've seen how homes on this specific stretch of water tend to fail first — which elevations take the worst of the wind-driven rain, where moss builds up fastest, which trim details were commonly done wrong in past construction cycles. That local pattern recognition shortens the diagnostic phase and means we're not guessing at what's causing the damage.
Our Process for a Lummi Island Repair Call
- Initial assessment — we look at the damaged area and the surrounding wall, not just the spot you called about, since related issues often show up nearby.
- Diagnosis — we identify the actual water entry point and check the condition of the barrier and sheathing behind the siding.
- Written scope — you get a clear explanation of what needs to happen and why, including whether repair or replacement makes sense for that section.
- Scheduling — we account for ferry timing and material delivery up front so there are no surprise delays once work starts.
- Repair and integration — damaged material and compromised sheathing are replaced, flashing is corrected, and new material is tied in and sealed properly.
- Final walk-through — we review the completed work with you before we consider the job done.
Maintaining Repaired Siding on the Island
Once a repair is done correctly, a little ongoing attention keeps it that way. Rinse moss and algae growth off periodically rather than letting it build up for a full season, especially on shaded walls. Keep gutters and downspouts clear so runoff isn't sheeting down a wall face. Walk the exterior once or twice a year and look for any new gaps at trim or fastener heads before they turn into a larger repair. None of this is a heavy lift, but on a marine-exposure site, it's the difference between a repair that lasts and one that needs redoing in a few years.
If you're dealing with damaged, discolored, or failing siding on Lummi Island, we'd be glad to take a look and give you an honest read on what it needs. Reach out for a free, no-pressure estimate — there's a form right below this page to get started.